Next, belt both sides of the Y bar. On the pulleys, the belt is routed as illustrated here. Of course, the toothed side of the belt goes towards the pulley, although the teeth are not drawn.

On the carriage, the belt goes like this:
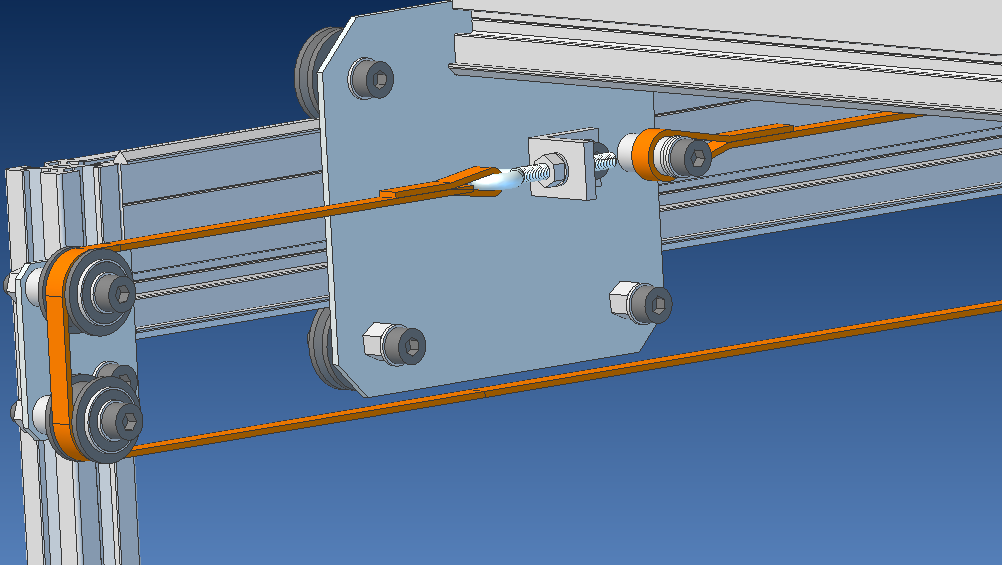
Secure the belt with zip ties as before. Before tightening, loosen the set screws on the pulleys. Tighten the belt on both sides: Loosen the nuts on the circular hook, pull the belt tight, tighten the nut on the back of the bracket (the nut that is not visible on the picture) and finally, secure the hook by tightening the other nut. Again, it should be tight but not enough to twist the machine. Ideally, you get both sides to be equally tight.
Move the Y bar back and worth a couple of times to set the pulleys and relative tightness of the belts. Tighten the set screws on the pulleys. Move the bar again. Ensure the axis rotates freely and the movement is smooth. (From the X axis, you get an idea about how much the motor resists the movement.) Look for vibrations on the Y axis in the back. If necessary, adjust the support plate position in the middle. When satisfied, secure the support plate to the table as well.