The control program looks like this (click for a full resolution image):
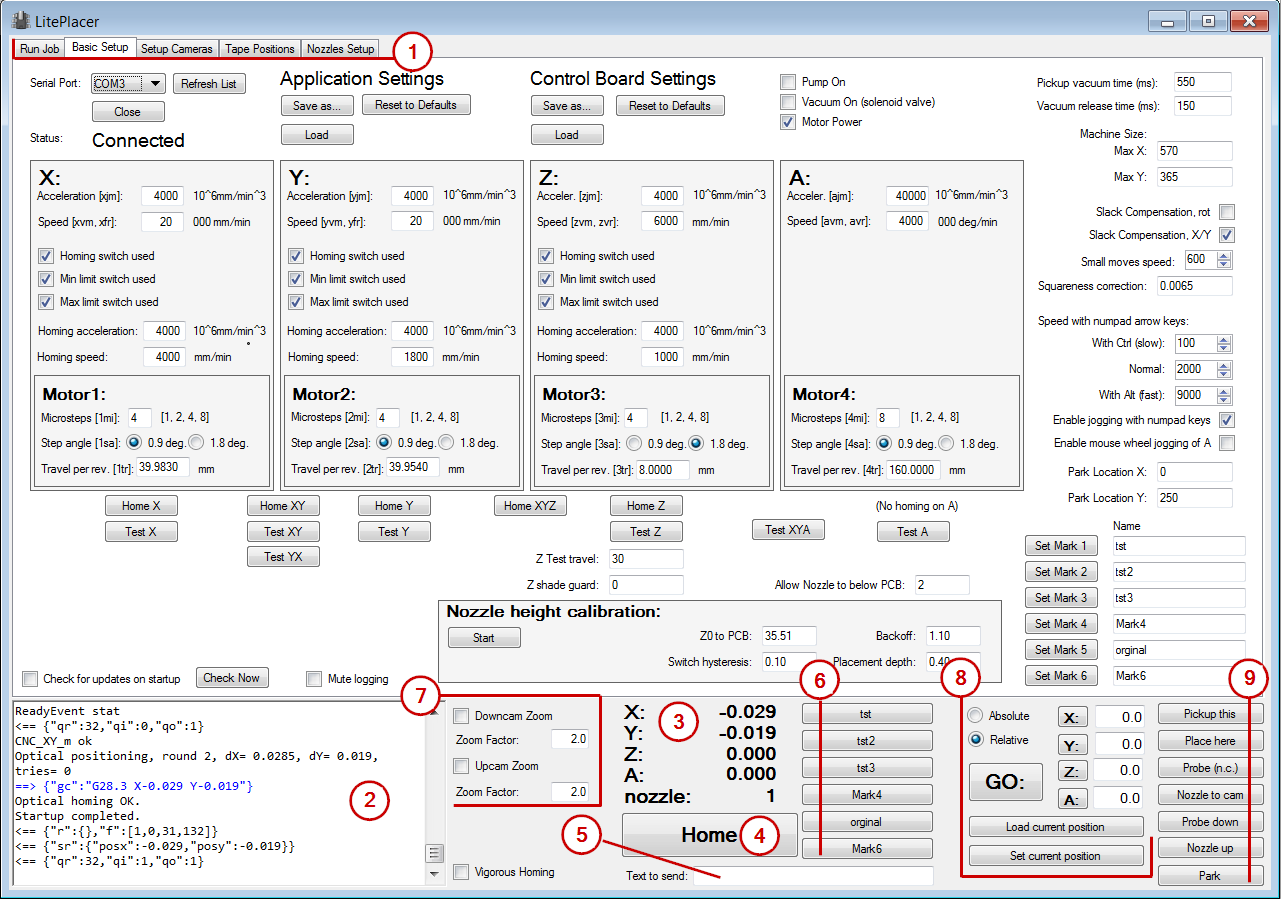
Most of the window, the top part, consist of several pages. Here, the “Basic Setup” page is shown. We’ll go through each page later. Select different pages by clicking the page tab, (1).
The bottom section stays the same, no matter which page is active on the top section. The leftmost section (2) is the log window. The program show here communication with TinyG, some diagnostics messages as well as diagnostic measurement results on “Setup Cameras” window. Normally, you don’t need to pay much attention to this. (If ever there is a need for troubleshooting, I might ask you to take a copy of the content (Ctrl-A to select all, copy and paste to a text document) and send it to me.)
Moving to right, there is a coordinate display (3). Below it, there is the “home” button (4). Make it a habit to press this every time you start the program, the TinyG motor power times out, you move the machine by hand or any other situation, when you think the machine might have lost its exact physical position.
The “text to send” window (5) under the home button send the text from the box to TinyG when you press enter. Normally, this function is not needed.
Further to right there are six user-assignable location shortcut buttons (6). You can name and set the corresponding location for these at the “Basic Setup” window. When set up, pressing a shortcut button will move the machine to the set location.
Further right are camera zoom controls (7) and below them, jogging functions buttons (8). On the rightmost column (9), there are a few test and debug buttons. You can find explanation for these buttons at (TBD). The bottom button is “Park”, which will take the machine at an “out of the way” location called “Park”, defined on the “Basic Setup” page.