Take the remaining 20mm x 20mm extrusions and attach those to the end of the MakerSlides. First, take the post where you tapped the end of and attach that to the front right:
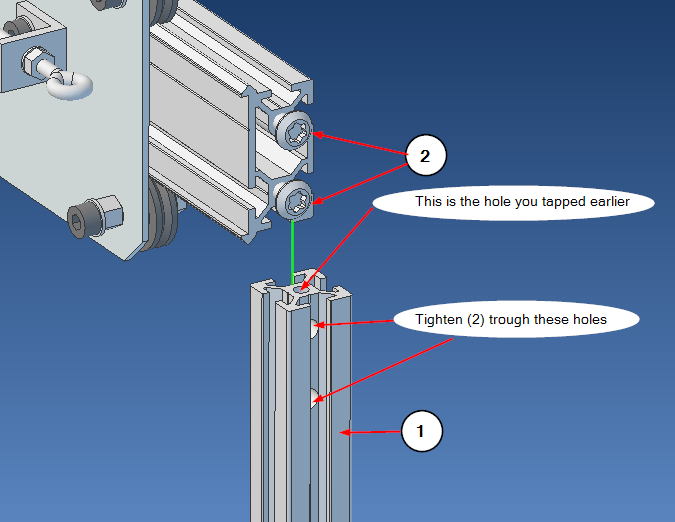
- 140mm extrusion, with tapped hole
- HJT5 self-tapping screws x 2
Front Left:
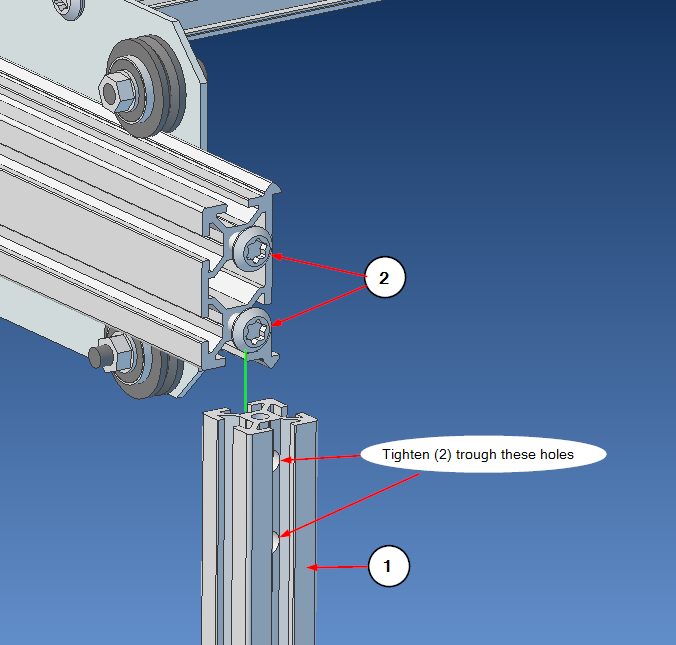
- Remaining 140mm extrusion
- HJT5 self-tapping screws x 2
Try to make the mounts flush and square. This is easier when you tighten the screws one after another with small increments, checking and adjusting along the way. You want to tighten the screws with the bar being close to the post.This lets the rails to adjust to the V-wheels.
When doing the final tightening, the crunching noise you may hear is the aluminum oxidation giving way, and that is fine, no reason to worry. I guess it is possible to overtighten the screws to do actual damage, but it won’t be very easy. 🙂
Once your done with this step, loosen the four screws that attach the long MakerSlides to the plates. Take the gantry to the end of the MakerSlides, and re-tighten the screws, again letting the MakerSlides to take their final position from the V-wheels. Repeat on the other end.
When done, ensure that the gantry rolls free back and forth as well as left and right at front and at back. You don’t need to worry about small non-squareness of the frame. The software has compensation for that; the smooth movement is what we are after.